Tuesday, January 21, 2014

Spaghetti Squash Au Gratin

Recently, I've developed a slight obsession with spaghetti squash. It's strange because I really don't care for any other squash. I never even knew about spaghetti squash until last year, and it still fascinates me! Coolest vegetable ever- starts like a pumpkin and after it's roasted, it spaghetti-fies!

This is my current favorite way to eat it, because it reminds me of one of my absolute favorite childhood dishes, hashbrown casserole. It makes me love vegetables, and I hate them with a a passion. Normally, I have to puree them into things and hide them like I'm feeding a toddler. Heh.

Anywho,

Spaghetti Squash Au Gratin

Only three ingredients, and it actually tastes better the second day! Woohoo for make ahead meals!

What you need:

1 Spaghetti Squash
1 cup -2 cups Sour Cream (I normally use 1 cup, but you may want more!)
8 oz of sharp cheddar cheese, grated

What to do:

To cook the spaghetti squash, preheat the oven to 350*. Use a sharp knife and cut the spaghetti squash in half longways. (It reminds me of a pumpkin...) Clean out the insides with a spoon- again think pumpkin. Save the seeds- they're easy to roast later, and I think they taste better than pumpkin seeds!

Put each side cut side down on a cookie sheet so the rind is facing you. Roast for 25-35 minutes. When it's done you should be able to lift one up, and it's soft and may be slightly brown.

This is the fun part- using a fork, rake out the insides into a bowl! It magically turns into 'noodles' that also taste good with spaghetti squash if you want to mix it up!

Dump the sour cream and cheese in with the spaghetti squash 'noodles' and stir to coat. Scrape into a glass 9 x 12 baking dish, flatten with a spoon, and bake for another 20 minutes until the cheese starts to bubble!

That's it! You could probably add onions, or other things too- I've just been too lazy!


So yummy! I think I topped this slice with chives :)


Monday, January 20, 2014

Saffron-Coconut Soup

First off, if you're planning this recipe be sure to find your saffron in advance! Be warned- it's expensive, but it truly makes the soup delicious! I went to three different Publix stores before finally finding it at Kroger. Apparently it's super popular... heh!

Anyways, this soup is great because it's quick and simple. I made it a day ahead of schedule, and it reheated well. You can vary the amount of spiciness to your liking. I used my Dutch Oven because I love it...hehehehe.

This recipe serves 4 people with about 2-3 helpings leftover depending on your bowl size.

What You Need:

4 13.5 oz Cans of Organic Coconut Milk (I find it in the Thai Food section of my grocery store)
Small Pinch of Saffron Threads

The spices I added to taste: I'll work on better measurements next time I make it!

3 TBSP Lemongrass Paste (I couldn't find fresh lemongrass so I found the paste in the fresh herb section)
2 TBSP Garlic Powder
2 TSP Celery seed
1 TBSP Coriander
1 TBSP Tumeric
1 TBSP Cumin
1 TSP Ginger

Cayenne Pepper, Chili Pepper and Red Pepper Flakes to taste (ie- pour some in, stir it, taste it, repeat if necessary)

Large handful of fresh cilantro

I also sautéed some baby portobello mushrooms to add and it was delicious! That's it! Just bring to a boil, lower to a simmer and keep experimenting with spices until you find your perfect level of spiciness.


Friday, January 10, 2014

Gluten Free Chicken & Dumplings with Leftover Chicken

On Tuesday, I roasted a chicken for dinner, but I never know what to do with the leftovers. In the summer I normally make chicken salad, but I wasn't really feeling the chicken and rice soup I had planned. It's been super cold (for me) in Georgia this week, and after a bad day the day before I really wanted some comfort food- so I decided to try Gluten Free Chicken and Dumplings for the first time!

I'm also experiemeting with measuring my flours with a scale to see if it helps my baking, and forgot to convert some of these numbers. I'll try to next time! This was delicious and is my new favorite way to reuse cooked chicken. I haven't tried reheating it yet, but plan to add to this post once I do!


Gluten Free Leftover Chicken & Dumplings

What You Need:

2 TBSP butter (I used Kerry Gold)
Shredded Carrots (I'm not a huge cooked carrot fan, so I used about a cup)
Sliced Mushrooms (I used a container of baby portobello)
1 small onion, diced (I used a Vidalia Sweet Onion)
2 Large spoonfuls of minced Garlic (more or less to your taste)
1 TBSP Sage
Chicken Broth (I make my own; used about 4 Quarts to almost fill up my 6 qt Dutch oven- you can add more or less depending on how much you want)
Leftover chicken
Salt & Pepper to Taste
1-3 heaping spoonfuls of gluten free flour

For the dumplings I used:

280g of Bob's Red Mill Biscuit and Baking Mix (I think this may be roughly over 2 1/4 cups, but I'm not 100%)
8 TBSP cold butter
1/2 Cup of Buttermilk
1/2 Cup Plain Whole Milk Yogurt
1 TBSP Baking Powder
1 1/2 TSP Salt

How to Make It:

I started by making the dumplings, which are basically dough for buttermilk biscuits. I mixed the dry ingredients together with a whisk and then cut in the butter with a pastry cutter. Next, make a well in the center and add the wet ingredients- I mixed the yogurt and milk in a measuring cup before adding it to the flour. Stir with a rubber spatula until the dough is formed. I made 8-9 little biscuit dough patties and left them in the bowl.

Heat the butter in a dutch oven until melted. Add the carrots and mushrooms and cook until softened- about 5 minutes. Then add the garlic and onions and cook until softened- another 5 minutes. Add the sage, and then add 1-3 spoonfuls of flour and stir for another 3 minutes to coat the vegetables.

Add the chicken broth and bring the pot to a boil- stirring as needed. Once it's boiling, bring it down to a simmer, and add the already cooked chicken. (Be sure to tear your chicken into bite sized pieces before adding!) Drop the dumpling dough on top and cover. Continue to simmer for another 20-25 minutes.

Turn on the broiler, and uncover your dutch oven. Put the pot under the broiler until the tops of the dumplings are brown!


This is a cool recipe because you could use whichever vegetables you like! It's easy to personalize if you want more or less chicken, carrots, etc. I'll definitely make it again!


Sunday, January 5, 2014

Divine Gluten-Free Cinnamon Rolls (Yeast Free)

Wow. 2014! It's been awhile.

What can I say other than life happens! There's been a lot of changes in my life (moved, got married! etc) but I'm hoping to devoting more time to this blog. It will probably be focused more on food. There's been changes there too- ever since I started my real food journey I started paying attention to what my body was telling me after eating certain foods. And what do ya know- I'm gluten intolerant.

I always get questions asking how I knew, and the first thing I did was give it a two week trial- never thought I'd last without bread, pizza, pasta, etc... but I felt so much better after the first week that I decided to keep going. Now, I don't even miss it, but I'm enjoying finding good substitutions for foods I used to love. Anyways, more on that later. I've developed many new recipes and recently I've gotten a lot of requests. I figured restarting this blog would be the best way to share that information with everyone!

Last night I had a dream where my mom and I were on a bus in another country, and I was trying to take pictures. All of a sudden, a man in the back stood up, and we fell into a hushed silence when we realized it was the Pope. (side note- I've never had a Pope dream before!) For whatever reason we started discussing cinnamon rolls and I woke up right as were were taking a cell phone picture to commemorate this occasion. I bet you can guess what I decided to cook this morning!

Ladies and Gentlemen... I present to you:


Stephanie's Divine Gluten-Free Cinnamon Rolls


What you need for the dough:
           2 Cup Tapioca Flour
           3/4 Cup Sorghum Flour
           3/4 Cup Almond Meal
           2 1/2 Tsp Baking Powder
           1/2 Tsp Salt
           1/2 Cup Organic Cane Sugar
            2 Large Eggs, Room Temperature
           1/2 Cup Organic Whole Milk, Room Temperature
           6 Tbsp Unsalted Butter, Room Temperature (I prefer the Kerry Gold brand)

For the Filling:
           4 Tbsp Unsalted Butter, Room Temperature
           1 Cup Organic Brown Sugar
           3 Tbsp Organic Ceylon Cinnamon

Preheat the Oven to 350 degrees and generously grease a muffin tin with butter.

In a large bowl, mix the flours, baking powder, sale, and sugar with a whisk until evenly blended. Add the butter and eggs, followed by the milk. Add the milk slowly while pausing to stir and check your dough.

Depending on your flour, you may need more or less milk. If you have too much liquid, and the dough is too runny and sticky, simply add more flour. (This happened to me the first go round because I used 1 cup of milk...I think a half cup should be the right amount!) The dough should be smooth and pretty easy to handle.

On a floured piece of parchment paper, mold the dough into a rectangle. Mine ended up being about 1/2 inch thick. It doesn't have to be perfect! At  this time you can also mix the filling ingredients together in another bowl, and spoon them onto the dough rectangle leaving about 1/2 inch on each side empty.

Gently roll it up and slice with a knife. Place each round into a muffin well. You should end up with 12 cinnamon rolls depending on how thick you slice the dough. If they start to fall apart, simply mold them back together. Next, I sprinkled additional brown sugar on top.

Bake 25-30 minutes until golden brown. Before they cool, transfer to a wire rack for cooling! If you let them cool in the muffin tin, they will start to stick!
         
This was my first time making a cinnamon roll from scratch, so this recipe may evolve over time, but I'm pretty pleased with it! They were fluffy, and satisfied my cinnamon roll craving. I hope you enjoy them too!

If you try this recipe, let me know what you think!

EDIT: 1/7/14

I'm planning on continuing to test this one because it hardens over a few days. The first day was wonderful, but they dried out as the week went on!




Monday, September 10, 2012

The Most Amazing Sauce Ever.

I've been on a gigantic Greek food kick lately. I feel the need to make something Greek once a week. My dad requested that I make the 'gyro sauce' the next time I made falafels, and was happy to oblige. Little did I know that it would turn out to be... the best sauce ever! I kid you not.

Normally, I'm not a huge Greek yogurt fan. I don't care for cucumbers and I don't like dill. However, magic happens when they're all combined together. And it's stored in the fridge really well. I made a batch a week and a half ago and it's still in the bowl with some plastic wrap covering it, and it tastes just as fresh.

The best part: you can put it on ANYTHING. This recipe makes a huge batch, so after eating it with our spanikopita and falafel we had so much left over! I dipped pita bread in it, my dad used it in place of mayo on a wrap, we used it for a vegetable dip instead of ranch dressing, we poured some over quinoa pasta to make a cold pasta salad, I added some to spaghetti and it tasted like an alfredo sauce, I topped a quesadilla with it instead of sour cream, and today we mixed it with chicken to make a quick chicken salad. It tastes amazing on anything!

You really should try it! I've eaten it as part of same meal every day for almost two weeks now.

I think I have a problem.


Magic Tzatziki Sauce

Ingredients:

*3 cups plain Greek yogurt
*2 tbsp lemon juice
*2 medium cucumbers, peeled and diced
*1 clove of garlic, minced
*1 tbsp dill (you can substitute mint if you like, but the dill was amazing! I think I ended up dumping 2 tbsp in by  accident...)

Method:

1. Place the peeled and diced cucumber in a colander over a bowl. Sprinkle with salt, and place a plate and something heavy over the top. (I looked around the kitchen and grabbed three potatoes. It looked ridiculous to anyone else entering the kitchen.) Let it sit for 30 minutes. This will draw the extra water out of the cucumbers and make the sauce less runny. Drain and wipe dry with a paper towel.

2. In a food processor or blender, process the cucumber, garlic, lemon juice, and dill until smooth. Add in the yogurt and continue to process until smooth and even. (It honestly looks like ranch dressing to me.) Let it sit, covered, in the fridge for a few hours before serving.

Warning: It makes a lot. Next time I'll probably cut the recipe in half, so we can eat it all in a week. Don't be afraid to play with the amount of dill depending on your taste. I didn't add any salt, because I added too much salt to my cucumbers during the draining process, so it was already pretty salty! You could add pepper if you'd like!


Wednesday, August 15, 2012

The best wrap ever, and my new favorite dessert!

 I've been eating some variation of this wrap at least two or three times a week this whole summer. I've recently discovered that I like avocados, so apparently I've been making up for lost time and eating them every day. There's something about this wrap that's so refreshing and it's ridiculously easy! You can toast it or eat it cold, and basically throw on whatever you feel like!


I start with a homemade whole wheat tortilla (check out the recipe on 100 Days of Real Food!) then spread a layer of hummus. Then I add on mozzarella, tomatoes, and avocado slices. Sometimes I drizzle it with balsamic vinegar for a bit of a kick, and boy is it yummy and filling! Just one of these babies fills me up for a good chunk of the day! I've also added leftover chicken, spinach, black beans, and just about anything else in the fridge depending on my mood- but this is definitely my favorite!

And speaking of favorites....


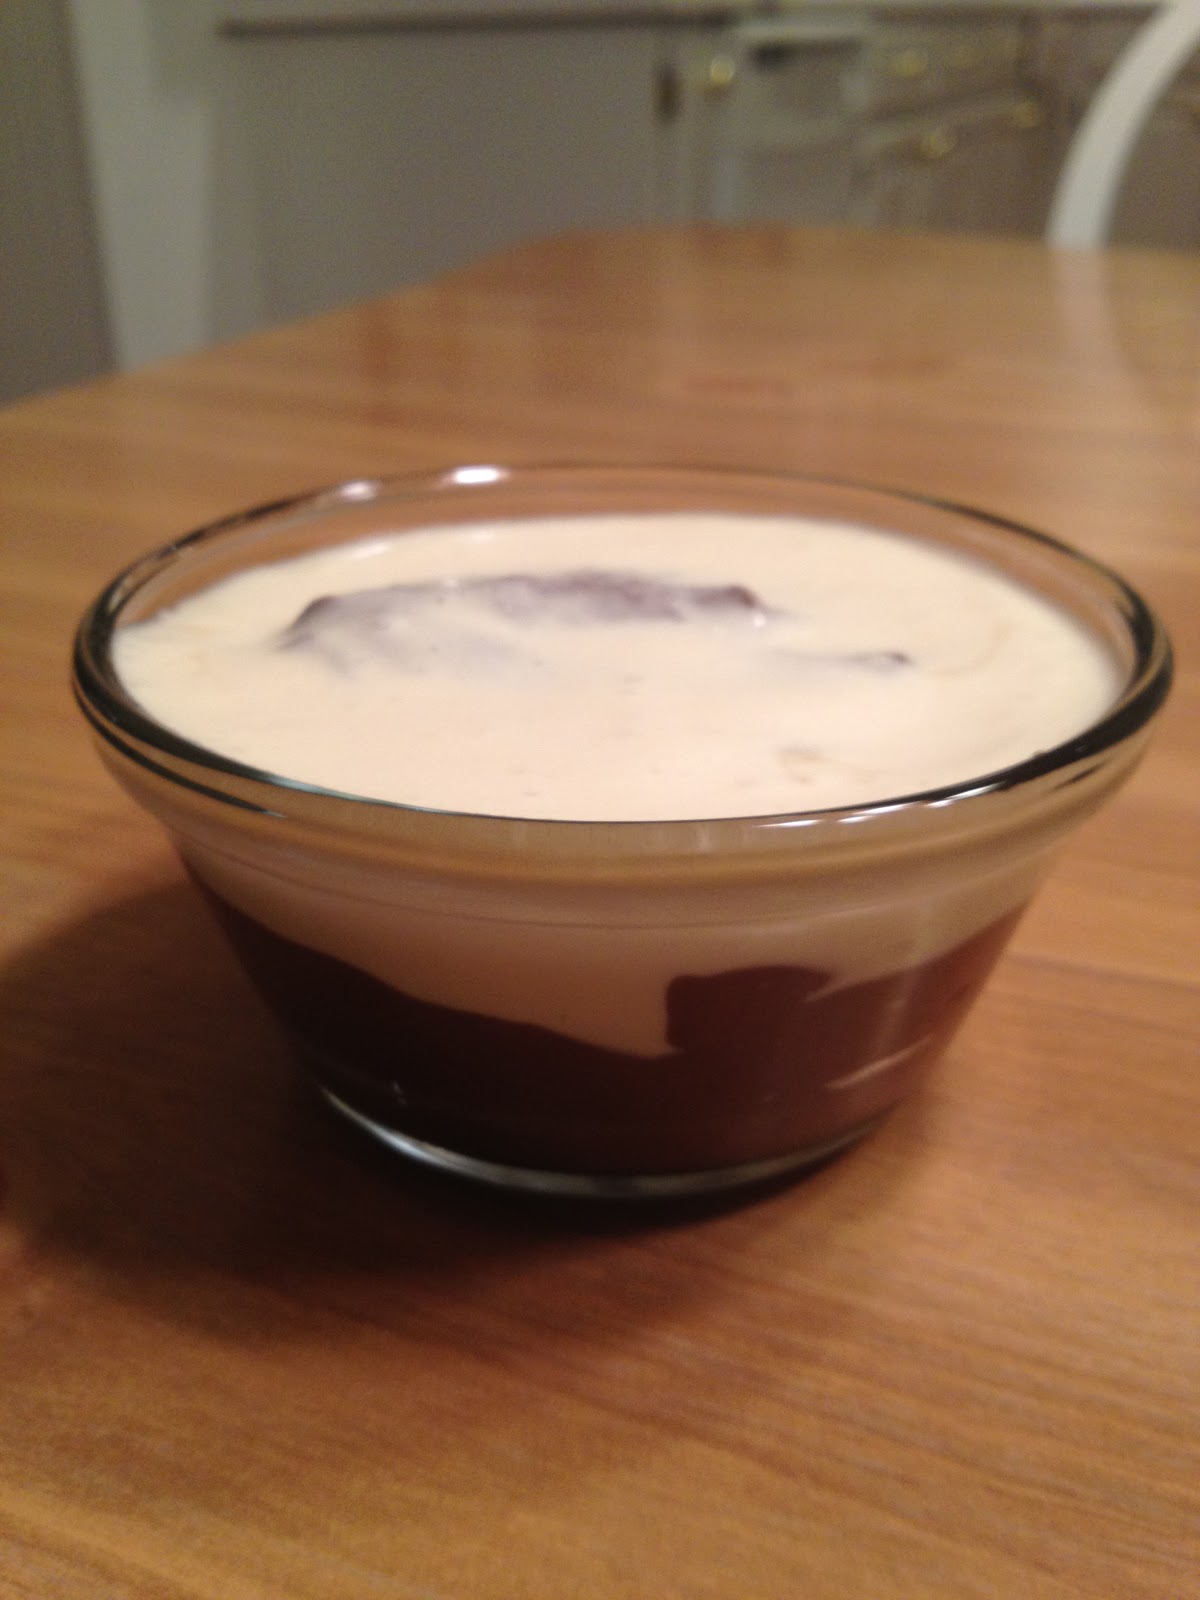
Holy Chocolate Avocado, Batman! I've discovered an awesome new dessert!

I've seen this recipe floating around Pinterest, but never remembered to try it. I also never believed that it would taste good, but boy was I wrong! You would never believe there was avocado in it! I served it to my dad and little sister without telling them what it was (they both hate avocados) and they loved it! It took less than 10 minutes with my food processor, and tasted better than any chocolate mousse I've ever eaten! It has a wonderful dark chocolate taste and will definitely satisfy those chocolate cravings. A little bot goes a long way- it's very rich!

PS- the white stuff on top was my attempt at making my own whipped cream which obviously failed because I was too lazy to get the mixer out, and my hand got tired after five minutes... It still tasted great though! Just wasn't fluffy... heheheh

Chocolate Avocado Mousse
 (Servings: 2)

Ingredients:
* 1 avocado, soft and ripe, peeled and pitted
*1/4 cup cocoa powder
*1 tsp vanilla (I used real vanilla which gave it a sort of liquor taste to some people, it was yummy!)
*6 Tbsp Milk
* 1/4 cup of pure maple syrup (once again I used the real stuff!)

Method:

Dump it all in a food processor! What could be easier?!

Note: I tried to use a blender at first and it did not work. The avocado was chunky, and you definitely want this to be pureed! I processed the avocado first and then added the ingredients in. I quadrupled the recipe and used four avocados which made about 6 half cup servings if I remember correctly. You really don't need a lot!

I also attempted my own whipped cream (see note above) by using 1 cup of heavy whipping cream, 1 tsp vanilla, 1 tsp maple syrup, but was lazy. It still tasted awesome on top though!

You might be able to play around with the amount of maple syrup, to save on calories. I think that was the worst part for you! And I think it's better to get a little avocado in you that eat pudding or other mousse. This will definitely be replacing my chocolate pudding recipe! And a few spoonfuls is enough and will completely satisfy your chocolate cravings!

Try this one! It will surprise you!


Monday, August 13, 2012

Spanikopita Bites

Spanikopita Bites, Falafel, Baba Ghanoush, Pita Bread


I have been on a HUGE Greek food kick lately. I feel the need to eat something Mediterranean at least once a week. I've also become a lot braver in the kitchen which makes it much more fun to try new recipes. I first found this recipe on Pinterest, and decided to make it for my dad one night. The hardest part was definitely using the phyllo dough, but i don't think i let it thaw enough before trying to use it. Luckily, it didn't affect the taste at all!

The moral of that story is: Relax! breaking the phyllo dough won't kill the dish!

I served it with homemade Baba Ghanoush, pita bread, and falafel and I'll post the recipes later for those!

This refrigerated really well too! The day after, I reheated it in the microwave and it was still crisp! The next few days, the dough got soggy, but it was still yummy. I literally ate it all week!

Spanikopita (I'll get a better picture next time!)

Spanikopita Bites

Ingredients:

*1 small onion, chopped finely
*3 green onions, finely chopped ( I bought pre-cut green ones
and just threw in several handfuls)
*10oz. Frozen chopped spinach ( I bought a tub of fresh baby
spinach and sautéed it with garlic and then chopped it. )
*6 oz feta cheese
*1 cup cottage cheese
*1 egg
*Salt/pepper to taste ( I actually forgot this part and it still
tasted fine. I didn't think it needed any!)
*1 lb. phyllo dough, thawed
*1 stick of butter, melted
*3 tbsp. olive oil

Method:

1. Preheat the oven to 375

2. Heat 1 tbsp of oil in a skillet over med. heat and cook onions for roughly 3-4 minutes. (This was when I cooked and chopped the spinach).

3. Mix spinach, feta cheese, cottage cheese, and egg in a mixing bowl. Add onions, and salt/pepper. Cover and refrigerate until needed.

4. Combine melted butter and rest of oil.

5. Unroll dough and cut into small squares. Size depends on the muffin tray you use. Brush the muffin tray with butter. Then, place two small squares of dough into pan and press into a cup shape. Brush butter on bottom and sides, and place two more sheets of dough. Brush with butter. Put two more sheets of dough, and brush with butter one more time.

(This was the hardest part- I may consider buying the pre-made cups next time, but these ended up cooking perfectly!)

Then, scoop a spoonful of the spinach mixture into the dough cup and close the extra dough sticking out of the cup over the top. Brush with more butter.

(My dough kept cracking so I used the broken pieces and pieced it together. The butter ended up keeping it all together!)

6. Bake for 20 minutes.

I used a regular cupcake pan and this recipe made 12 spanikopita muffins. The crust ended up turning a light golden brown and the mixture was yummy! They came out easily and didn't fall apart. The most time consuming part was dealing with the phyllo dough!